Hardware was the first part to be designed in a computer system. It is followed by the software part. Each hardware was specially designed with its own instruction set and developed with its own specific software. In the early days, this was enough to cater for a small community where file sharing and software distribution are not widely practiced. As time goes by, more and more computers are use and each of them are connected to one another, thus making rewriting and distributing software that are compatible to the hardware a major burden.
The need of software that is compatible with any hardware becomes an important consideration in developing a new computer system. This can be achieved by producing hardware that has a standard feature. One way to achieve this is by defining and controlling the interface between hardware and software. This is where the concept of Instruction Set Architecture (ISA) was introduced.
A new problem arises following the introduction of ISA. The operating system developed was only compatible with the hardware from the same vendor. Due to this reason many operating systems were developed for particular system architecture only and cannot be implemented in other machines that have different architecture.
Virtualization eliminates these constraints and enables a much higher degree of portability and flexibility. Software is added to an execution platform to produce virtualization to give it the appearance of a different platform. Virtualization supports an operating system, instruction set, and computational resources which differ from those available on the underlying software. One of virtualization environment created by such software is called virtual machine.
Virtual Machine
Virtual machine (VM) is defined as an efficient and isolated duplicate of a real machine. This environment is created by using Virtual Machine Monitor (VMM) which provides a second layer on a machine for another operating system to run on it. VMM reproduces everything from the CPU instruction to the I/O devices in software of operating system which it run on. Virtualization in VM involves mapping of virtual resources, for example, the register and memory to real hardware resources and it also use the host machine instruction to carry out the actions specified by VMM. This is done by emulating the host ISA.
VMware is a company that provides virtualization software for x86-compatible computers. VMware Inc. is a subsidiary of EMC Corporation and has its headquarters in Palo Alto, California. The term "VMware" is often used in reference to specific VMware Inc. products such as VMware Workstation, VMware Virtual Desktop Infrastructure, VMware Player and VMware Server.
VM, which stands for "Virtual Machine" (not to be confused with the broader term virtual machine), is a widely-installed operating system for IBM-compatible computers and servers that can host other operating systems in such a way that each operating system behaves as if it were installed on a self-contained computer with its own set of programs and hardware resources.
VMware Workstation makes it simple to create and run multiple virtual machines on desktop or laptop computer. We can convert an existing physical PC into a VMware virtual machine, or create a new virtual machine from scratch. Each virtual machine represents a complete PC, including the processor, memory, network connections and peripheral ports.
VMware Workstation lets us use our virtual machines to run Windows, Linux and a host of other operating systems side-by-side on the same computer. You can switch between operating systems instantly with a click of a mouse, share files between virtual machines with drag-and-drop functionality and access all the peripheral devices you rely on every day.
VMware Workstation Installation.
Installing VMware Workstation
Finally, we take a look at the installation process. Start the installation by running the file VMware-workstation-6.0.0-45731.exe and following the screen shots below.
Screen 1: - Welcome

The first screen is simply a Welcome screen. Click [Next] to start the installation process.
Screen 2: - Setup Type
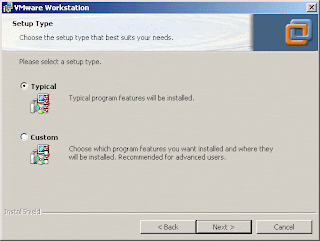
Choose a setup type of "Typical" and click [Next] to continue.
Screen 3: - Destination Folder
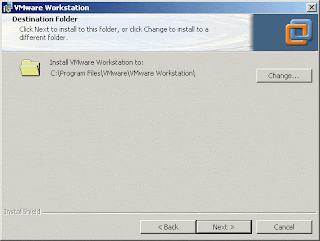
The default destination folder for VMware is C:\Program Files\VMware\VMware Workstation\. I typically keep the default. Click [Next] to continue.
Screen 4: - Configure Shortcuts
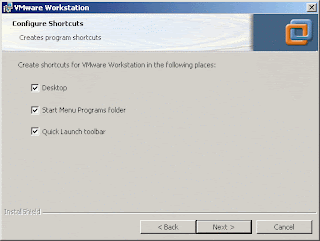
The installer can automatically create shortcuts for easy access to the VMWare application. I generally choose to keep all shortcuts checked. Click [Next] to continue.
Screen 5: - Ready to Install the Program

This screen is pretty much a confirmation screen. To start the installation process, click [Install].
Screen 6: - Installation Progress
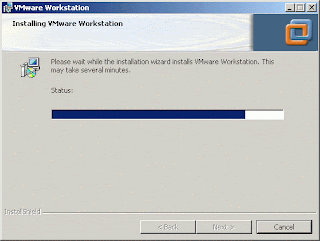
The installation process...
Screen 7: - Registration Information

The next dialog asks for user information and serial number for the product. Although this is an optional step (it can be completed at a later time) I typically get it out of the way and enter all information required. Click [Enter] or [Skip] to continue.
Screen 8: - Installation Wizard Complete

And that's all there is to it. VMware is now installed and ready for you to start creating virtual machines. Click [Finish] to exit the installation wizard.
Screen 9: - Reboot Machine

After installing VMWare Workstation, the installation wizard prompts you to reboot the machine. Click [Yes] to reboot the machine.
Starting VMware Workstation
The VMware installer will create an icon on the Windows Desktop as well as the Quick Launch bar. To start VMware Workstation click either one of these icons.
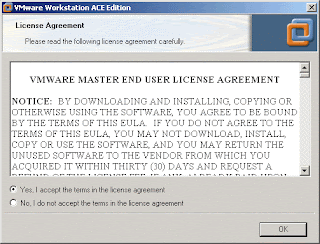
When starting VMware Workstation for the first time, we are asked to read over and accept the user license agreement. If we agree with the user license agreement, select "Yes" click [OK] to start VMware Workstation.
At this point, weccan start to use the VMware Workstation software to create (or run) our own virtual machines.


No comments:
Post a Comment